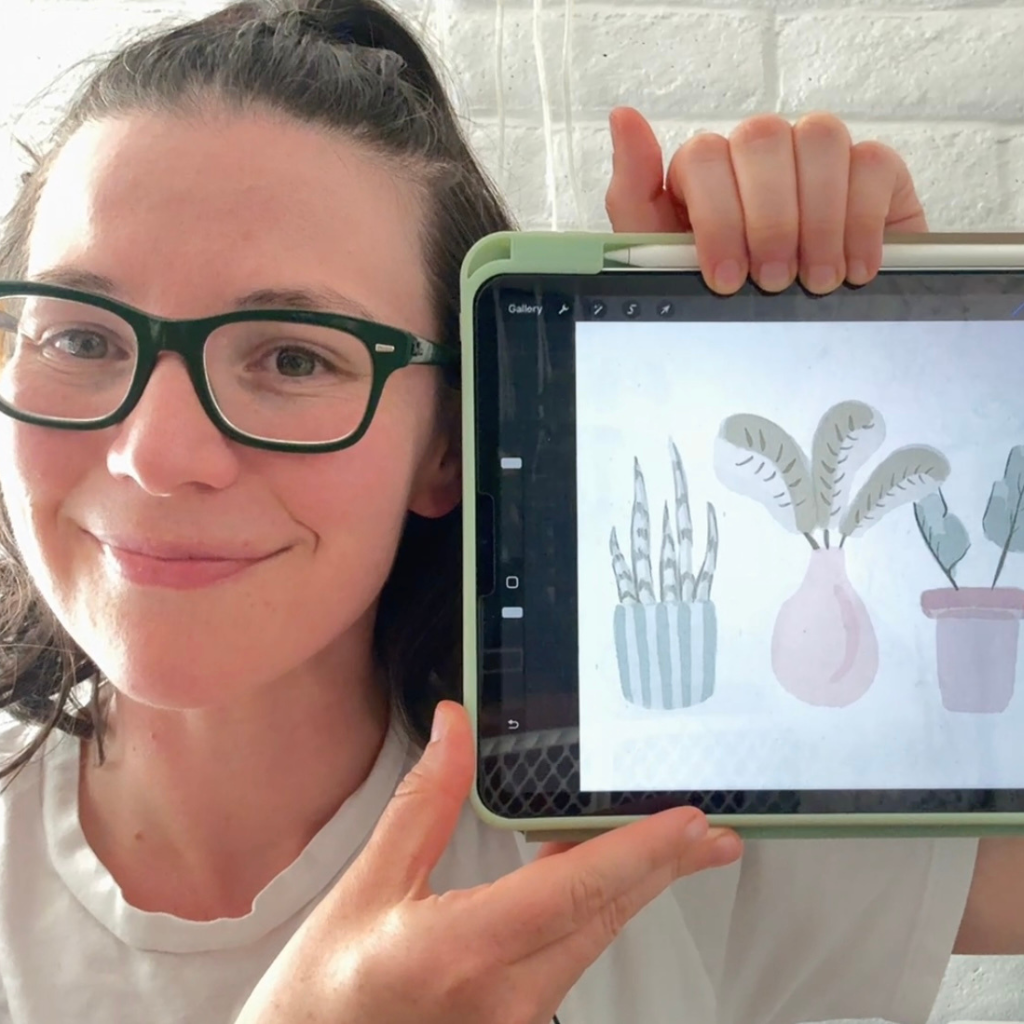
Whether you’re just starting out in digital art or you’ve been illustrating for years, mastering Procreate can make a huge difference in your creative workflow. With its powerful features and intuitive interface, Procreate is a favorite among artists on iPad. But even seasoned users miss out on some of its hidden gems. Let’s dive into10 Procreate tips every digital artist should knowto save time, spark creativity, and take your art to the next level.
1. Use QuickShape for Perfect Lines and Shapes
Hold your stylus at the end of a stroke to activate QuickShape. This automatically straightens your line, perfects your circles, or snaps your rectangles into shape—ideal for geometric art, clean borders, or perspective work.
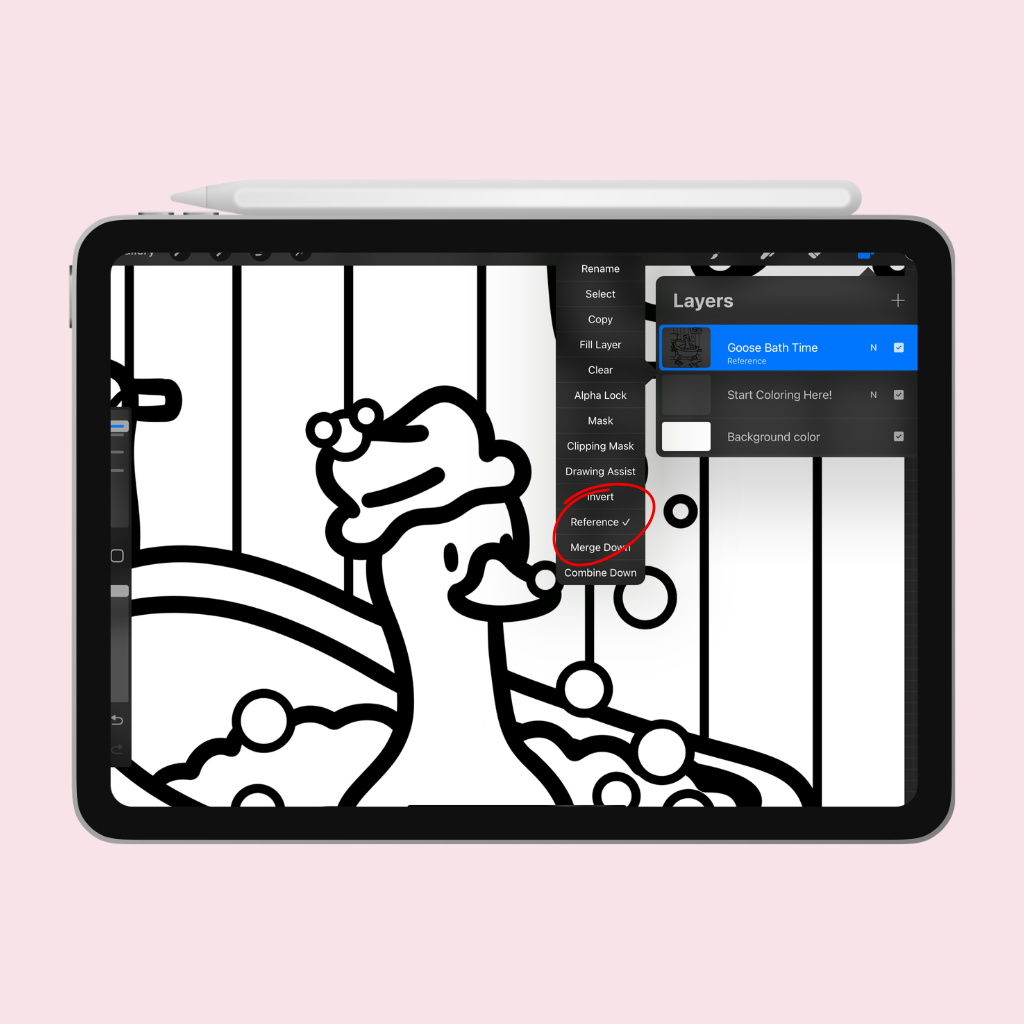
2. Master the Reference Layer
Set any layer as a Reference (tap the layer > Reference), and Procreate will use it for fills and selections. This is perfect for keeping your line art and color layers separate while still being able to use color drop efficiently.
3. Organize with Layer Groups
Keep your canvas clutter-free by grouping layers (pinch them together). It’s great for separating backgrounds, line work, colors, and effects—especially in complex illustrations or animations.
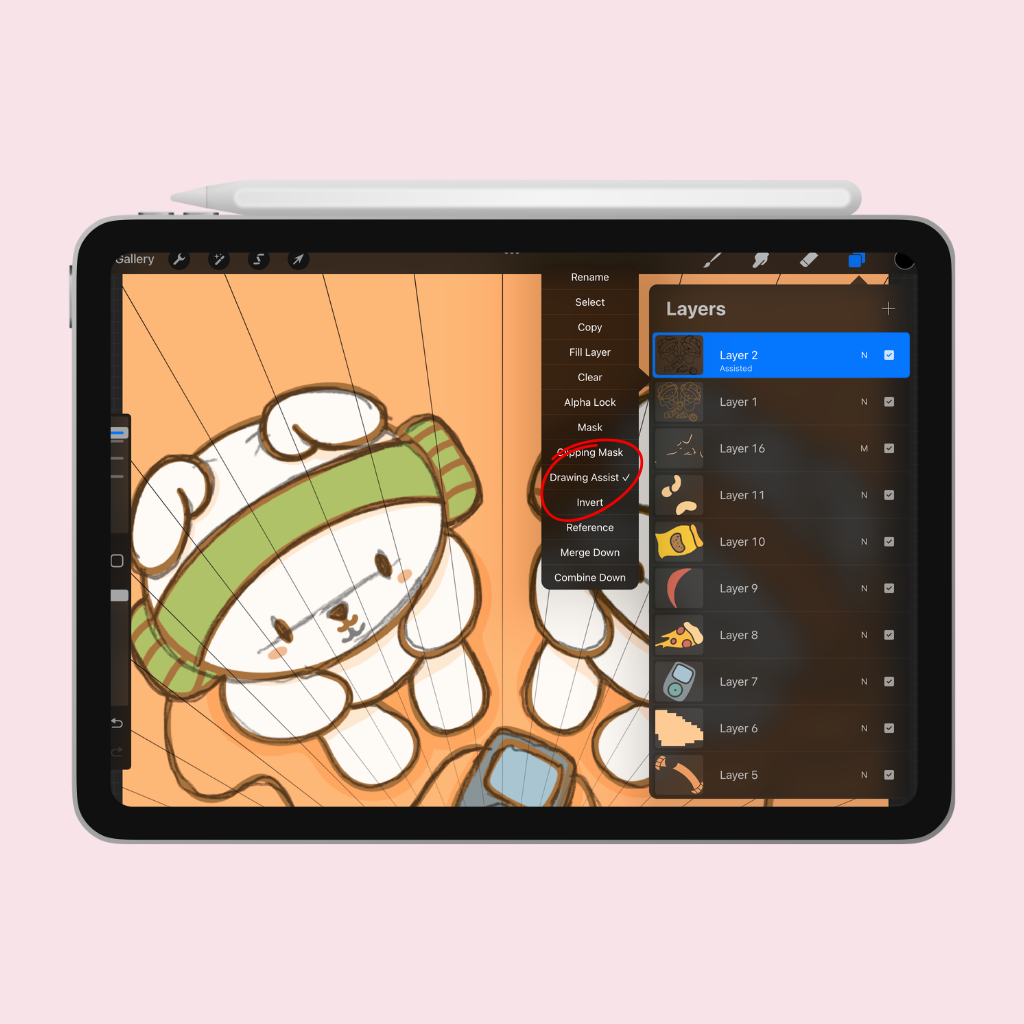
4. Turn On Drawing Assist for Symmetry
Tap on the wrench icon > Canvas > Drawing Guide > Edit Drawing Guide. Turn on symmetry for perfect mirrored drawing—a game-changer for character design, mandalas, or balanced compositions.
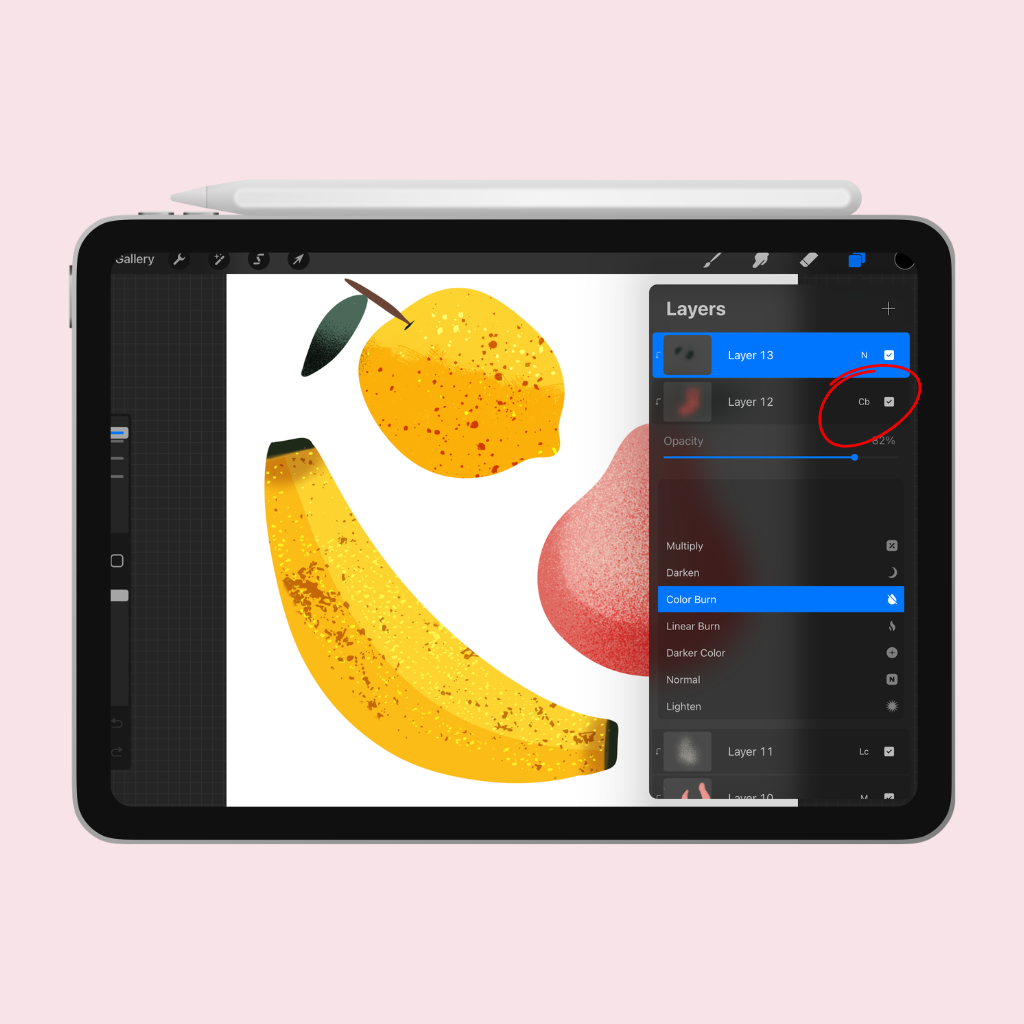
5. Experiment with Blend Modes
Each layer in Procreate has blend modes (like Multiply, Add, Overlay) that affect how it interacts with the layers beneath it. Try “Multiply” for shadows or “Add” for glowing light effects—this opens up endless stylistic options.
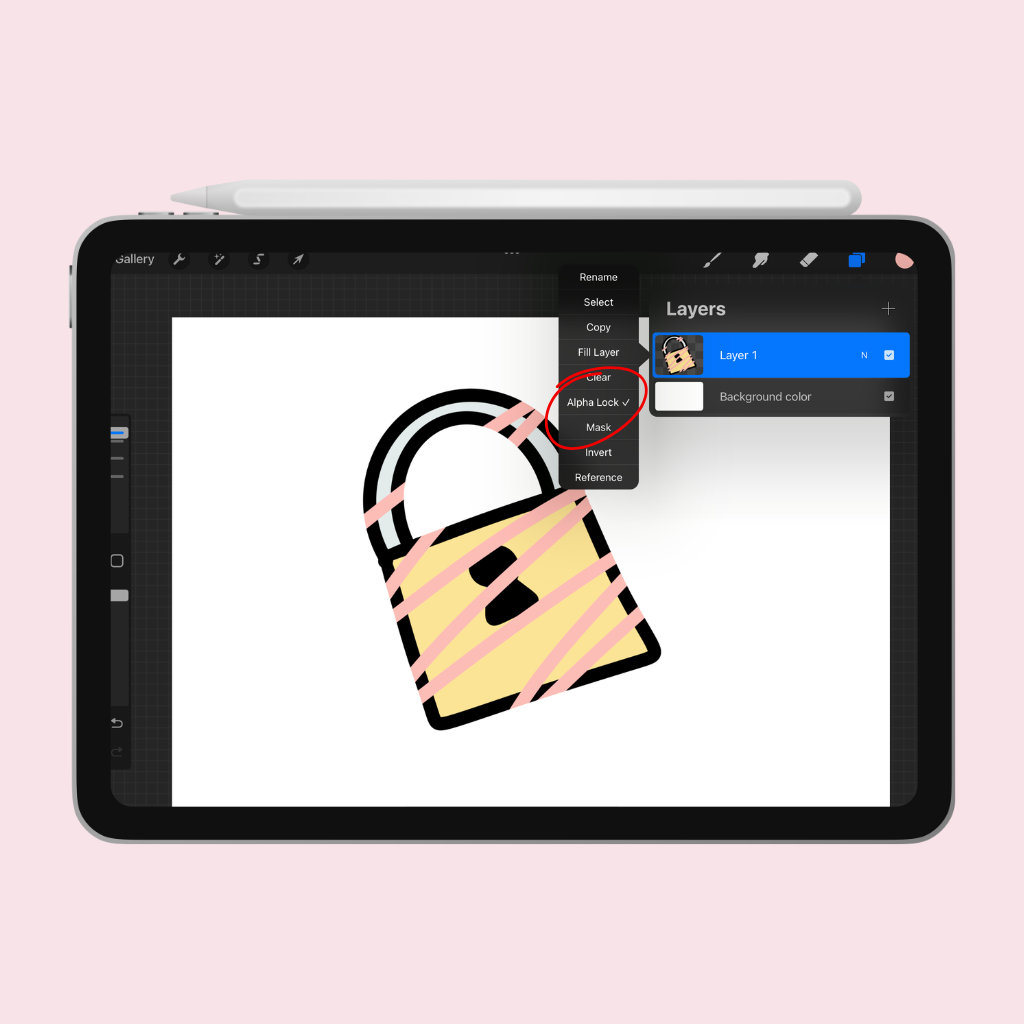
6. Use Alpha Lock for Clean Edits
Swipe right with two fingers on a layer to Alpha Lock it. Now, any changes you make—like shading or texture—will only affect the existing content on that layer. No messy overlaps, ever.
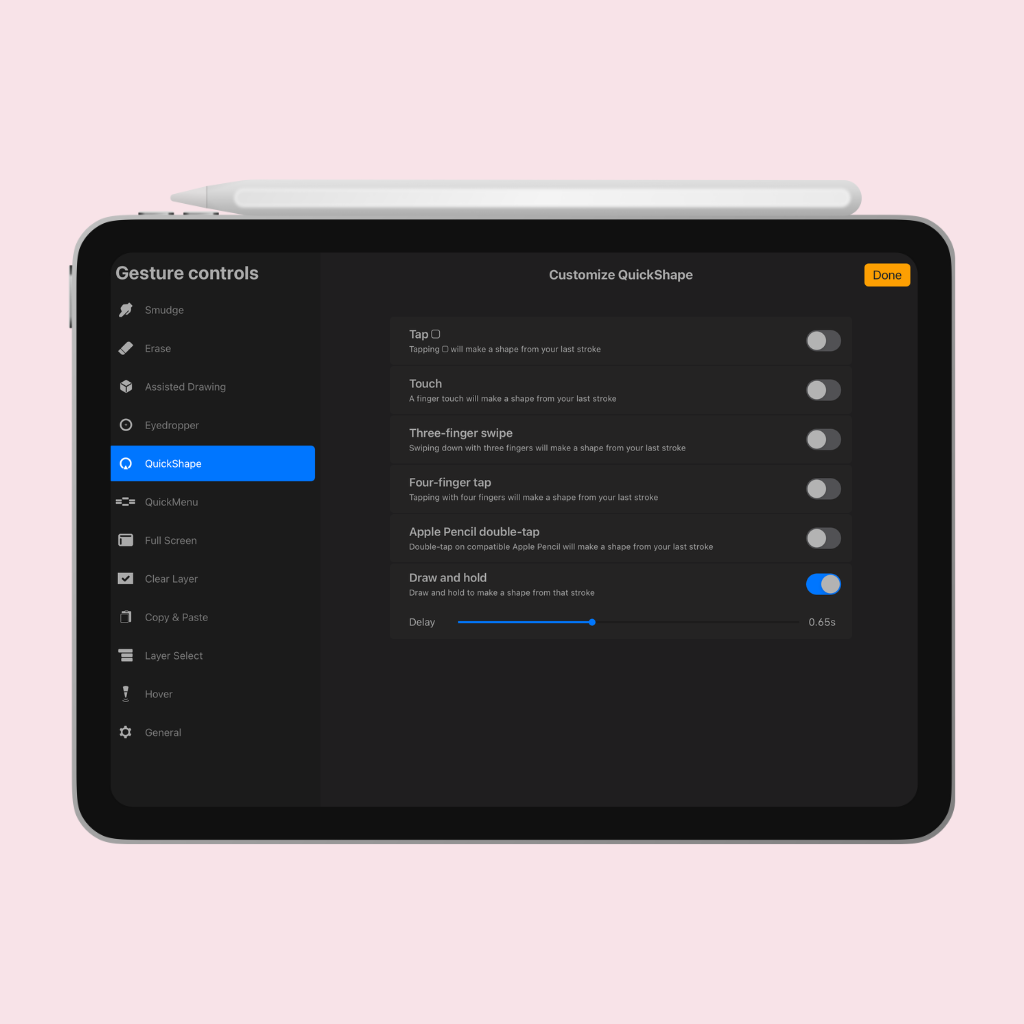
7. Customize Your QuickMenu
QuickMenu is a shortcut menu you can customize to suit your workflow. Go to Actions > Prefs > Gesture Controls to assign it to a gesture (like tapping and holding) and fill it with your favorite tools and actions.
8. Create and Save Color Palettes
Tap the color circle > Palettes tab > + to create a custom palette. You can even drag and drop colors from images or reference files. This is especially helpful for consistent branding, themed artwork, or fan art accuracy.
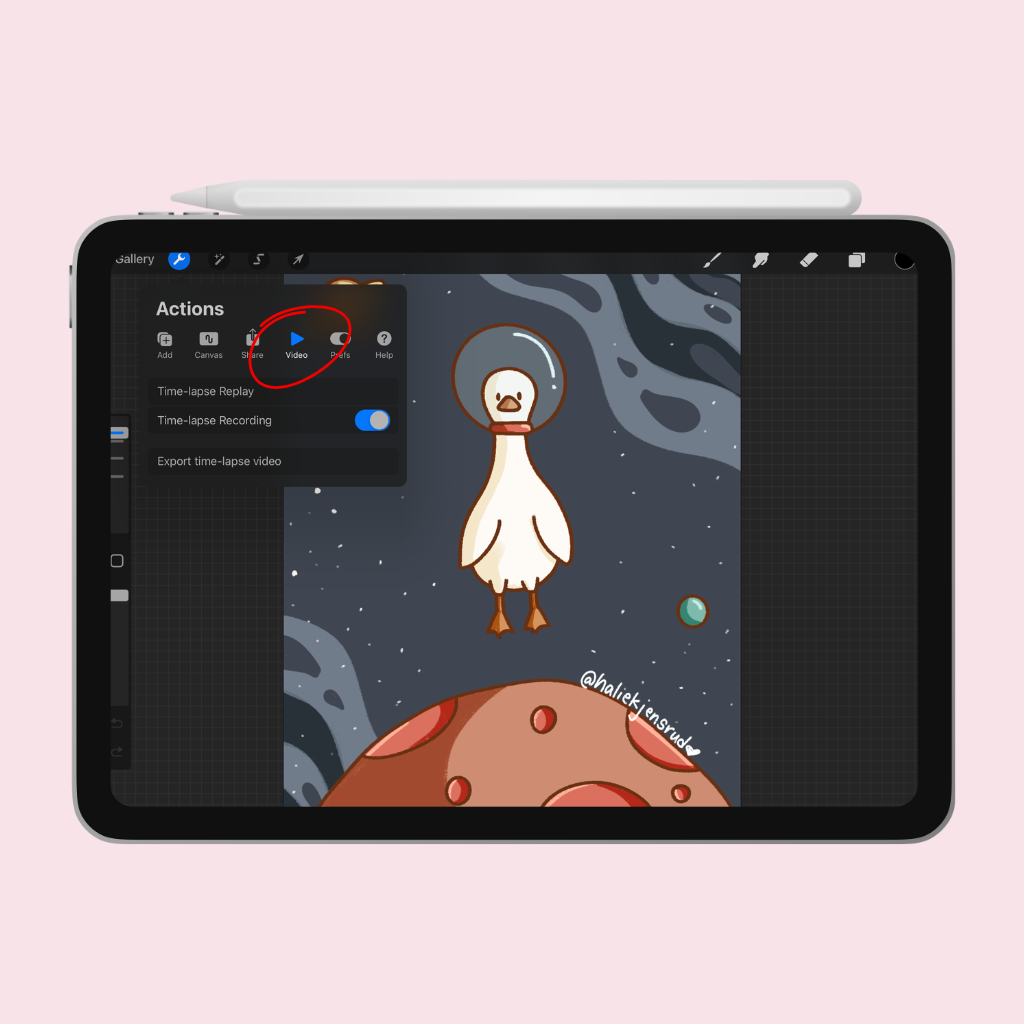
9. Use Time-Lapse Recordings
Procreate automatically records your artwork process. Go to Actions > Video > Export Time-lapse Video. It’s perfect for social media, YouTube intros, or tracking your progress over time.
10. Back Up Your Work!
Don’t risk losing your art. Regularly export your files as .procreate, PSD, or high-res images to iCloud, Google Drive, or an external drive. It’s a good habit that will save you future heartbreak.
Final Thoughts
Whether you’re creating cozy illustrations, slick designs, or experimental animations, these tips will help you get more out of Procreate. If you found these useful, consider bookmarking this post or sharing it with a fellow digital artist.
And if you’re looking for more hands-on help, check out myYouTube channel for Procreate tutorials, or explore myEtsy shopfor custom brush sets that bring your art to life.